Annotation Guidelines
Image Sourcing & Captioning
Table of Contents
-
Annotation Guidelines
- Image Sourcing & Captioning
- 2. Brand and Products
- Products
- 3. Find your relevant Product Images & Lifestyle Images
- 4. Identify Product vs Lifestyle Images
- 5. Select the product category and subcategory
- 6. Captions in the Product Image
- Short vs Long Caption Guidance for Product Images
- 7. “WILD” vs “PLAIN”
- 8. Caption to the Lifestyle Image
- 9. Camera Shot
- 10. Bounding Box
- 11. Video
- *️⃣ Reminders & Best Practices
- Bounding Boxes
- Rules / Qualification
- Example Valid and Invalid Product Images
- Product Images
- Lifestyle Images
1. Logging in to your Account
Always use the Moonvalley Annotation platform to complete all work, otherwise you won’t be compensated.
Login at https://piezee.com/Your dashboard consists of 2 sections,
Pending Annotations – all annotations that are pending for review.
- Completed Annotations – all annotations have been approved.
2. Brand and Products
Brands
Source Product Images and Lifestyle Images from the provided set of Brand URLs. You will be assigned URLs and should aim to annotate all relevant products before moving to the next brand.
Do use: only retail brand URLs (e.g. Zara, Bose)
Do NOT use: Marketplace URLs (e.g. Amazon, Alibaba)
Marketplace URLs refer to those that sell products from various brands.
If you were given a Brand URL that is a Marketplace, please tag this as an Invalid URL.
Ensure that the Brand URLs include the complete URL.
The ‘https://’ is an essential part of the URL.
Follow the Brand Name as indicated by the URL you are working on. The Annotation Assignment list may sometimes have unusual formatting or incorrect names.
Products
Products that are out of stock can still be annotated, as long as there are valid images. If the product is available only in certain variants (e.g., a blue shirt is no longer available), you may still annotate any color variants with valid images, regardless of their availability.
3. Find your relevant Product Images & Lifestyle Images
Can source the following combinations:
Product Image and Lifestyle Image (see definitions in
4. Identify Product vs Lifestyle Images)No product images but has Lifestyle Images
[NOTE: If all images are lifestyle shots, upload 1 product image + 4 lifestyle images.]
The following combination is invalid (skip the product in this case):
No Lifestyle Images
4. Identify Product vs Lifestyle Images
From the Product URL, save the following types of images and mark the type (need to delineate between the two types of image):
1x Product Image (see dropdown for definition)
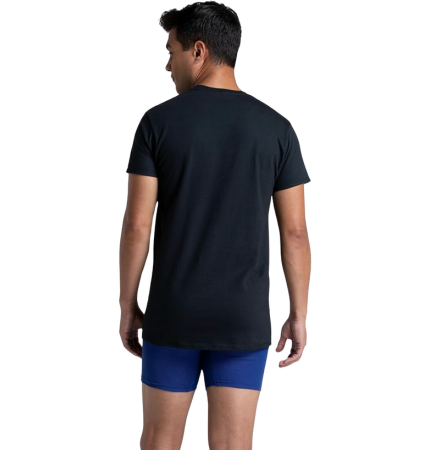
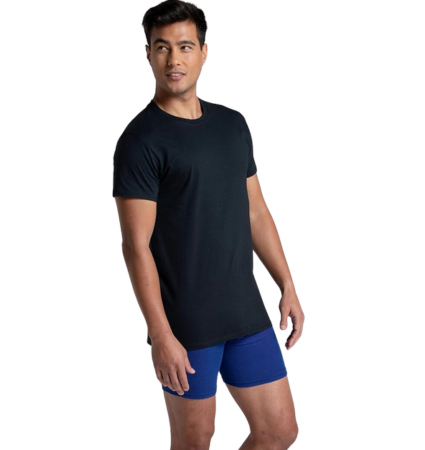
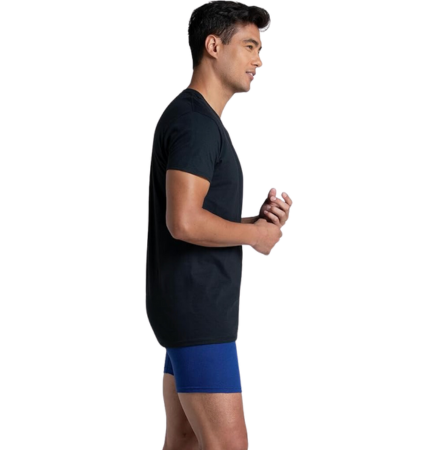
Product Image Definition:
- The product image should be isolated
- Color
- Featuring either a transparent or solid color background
- A neutral or plain background
- Objects in the image
- The image never include humans. Objects in an image could come in pairs/triplets/etc.
- Object could be located not in focal point of an image
- There should be no text or graphics on the image (Text or graphics printed on the product is OK)
- No other artefacts present on image such as stripes, compression artefacts, marks, highlights
- The image should not have an extreme aspect ratio (>4)
- It should not depict the product in a real-life environment or setting. It is merely an image designed to show the user a given product in a high-level of detail from a given angle, or series of angles through multiple product images
- The whole product should be shown
- Packaging
- If the product has packaging, then show the product, not the packaging
- Image Quality and Format
- The image should be a minimum resolution of 768px
- The image should be JPG, PNG
- Max file size of 10MB
- Surface textures are captured clearly
- Lighting and Colors Requirements
- The lighting of an image shouldn’t be too dark or bright that ends up distorting or hiding the original product’s details
- Ensure the color of the object is accurate
1x Lifestyle Image OR 2x Lifestyle Images if no Product Image (see dropdown for definition)
Lifestyle Image Definition:
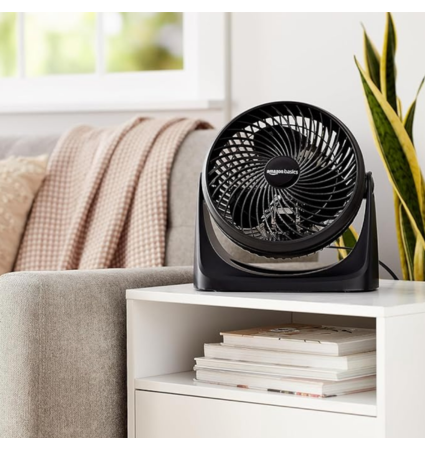
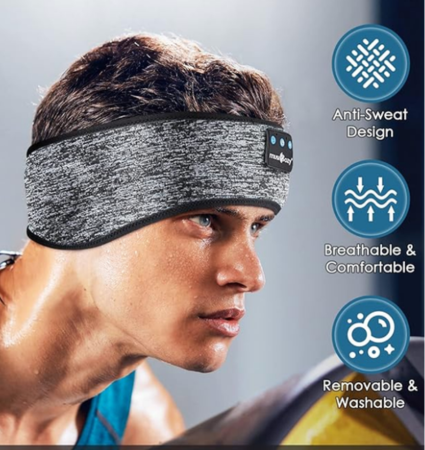
- Setting
- An image that depicts the product in use within a real-life setting, showcasing its practical application and context.
- This type of image helps to convey how the product fits into the daily life of the consumer, often featuring human interaction or a relatable environment.
- Objects in the image
- There should be no text or graphics on the image (Text or graphics printed on the product is OK).
- Object could be located not in focal point of an image.
- Photo can feature multiple instances of a product.
- No other artefacts present on image such as stripes, compression artefacts, marks, highlights.
- The image should not have an extreme aspect ratio (>4).
- The whole product should be shown.
- Extra additions to the image that wouldn’t be natural.
- Image Quality and Format
- Minimum of 500x500px.
- JPG or PNG.
- Lighting and Color Requirements
- The lighting of an image shouldn’t be too dark or bright that ends up distorting or hiding the original product’s details.
- Ensure the color of the object is accurate.

5. Select the product category and subcategory
List of product classifications:
Electronics
Home & Living
Beauty & Personal Care
Health & Fitness
Clothing Accessories
Fashion (Women’s)
Fashion (Men’s)
Fashion (Kids’)
Toys & Games
Automotive
Books, Music & Movies
Office Supplies
Pet Supplies
Baby & Maternity
Tools & Home Improvement
Travel & Luggage
Arts, Crafts & Sewing
Musical Instruments
Event & Party Supplies
Industrial & Scientific
Collectibles & Memorabilia
Jewelry
Automobiles
Food and Beverages
6. Captions in the Product Image
Write two captions to describe the Product in the Product Image.
NOTE: If the product has no product images, annotate one of the lifestyle images the same way you would annotate a product image (using the instructions below).
Short vs Long Caption Guidance for Product Images
For the Short Description:
- Emphasize simplicity.
- Focus only on the key elements. What this object is, if something that comes in different shapes (i.e. perfume bottle), function, material, color
- 20-25 words maximum, but better to keep it 5-15 words
- Avoid using too many details for the short description and focus only on the key attributes.
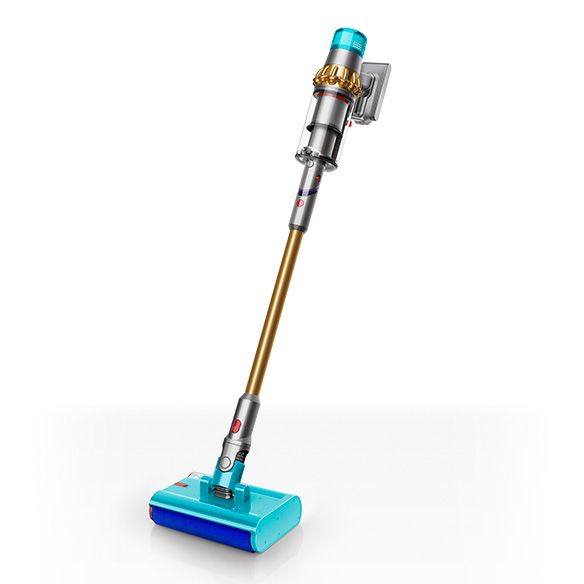
- Example: A cordless vacuum with a light blue base and silver and gold handle
For the Long Description:
- 20-250 words.
- Include all the specific details: the color of the fan, the number of blades, the material of the blades, brand/manufacturer, and any additional features such as the industrial cage around the lights.
- Do not describe it in a way to sell it; describe it in a way to help a machine learning model understand what it looks like.
- Only include details that can be gathered from looking at the image; do not include details that would only be learned from the product description.
- Any positioning should be based on your perspective looking at the image (e.g., left, right). Example: A cordless Dyson vacuum cleaner with a light blue vacuum base and silver and gold handle.
Example 1
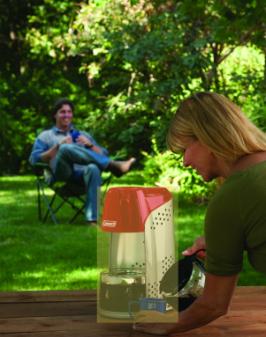
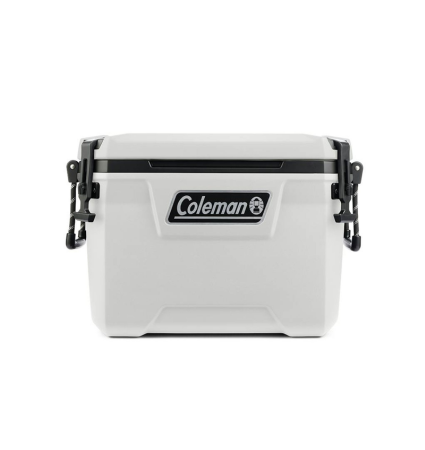
Short: A red and gray coffee maker with a glass carafe.
Long: A Coleman coffee maker featuring a bright red top and handle, paired with a sleek gray body that has a perforated metal side. The glass carafe is marked with measurements and sits within a black base. The design includes a clear glass carafe with a red handle, and the entire machine has an industrial, rugged aesthetic typical of outdoor appliances.
Example 2
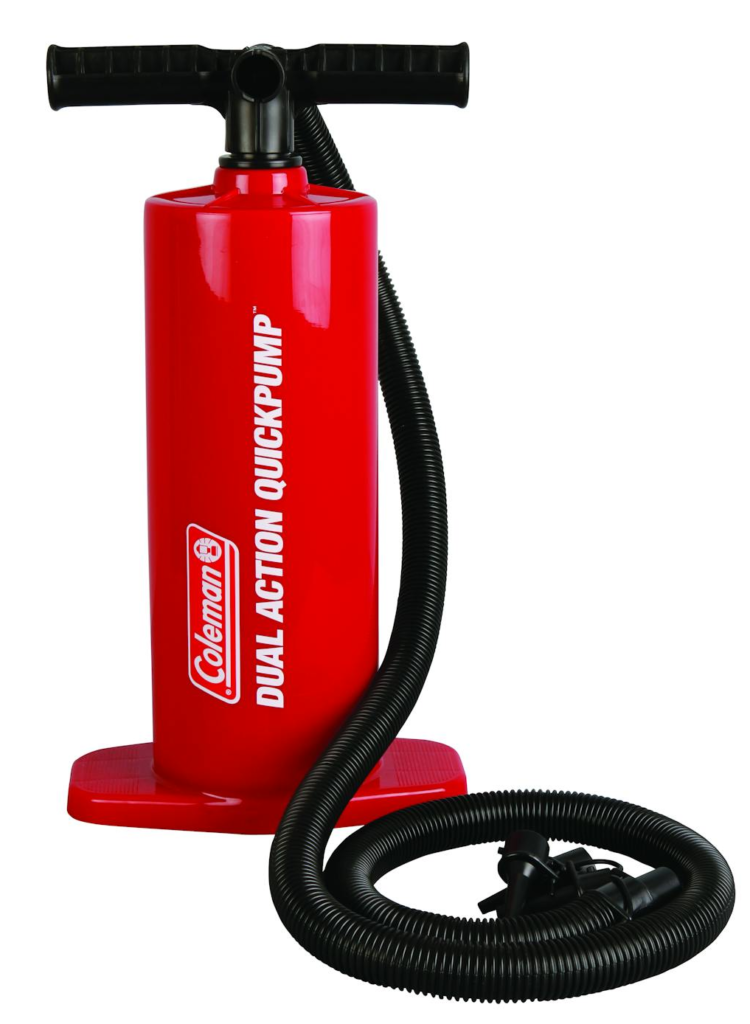
Short: A red manual air pump with a black hose.
Long: A Coleman Dual Action QuickPump featuring a bright red cylindrical body with a black T-shaped handle at the top. The pump has bold white branding and text on the front, and it is equipped with a flexible black hose coiled at the base, designed for inflating various items.
7. “WILD” vs “PLAIN”
Label the Lifestyle Image as either “In the wild” OR “Plain background”.
- In the wild example
An image that has a natural background setting
Plain background example
“Plain background” (an image against a neutral–colored background)
8. Caption to the Lifestyle Image
Add one caption to describe the Lifestyle Image. Only one caption in detail is required.
Guidelines & Examples for Lifestyle Image Caption (see dropdown)
- Identify and describe the main objects and their positions within the image (e.g. centered, top right corner, slightly off center to the left).
- Positions i.e. “left” and “right” are based on your perspective looking at the image.
- Describe any prominent shapes and colors of these objects. Describe any textures or patterns.
- Details of how this product exists and interacts with the rest of the objects in this image.
- Describe the background in the image.
- Avoid any description speaking to the feeling of the image (e.g. “adding a touch of life to the composition.”) or any other commentary that doesn’t help recreate the image. (You aren’t trying to sell the product, you’re trying to describe how it looks for a machine learning model.)
- Pay special attention to ensuring the product image that’s now in the lifestyle image is described in a way it can be reproduced with sufficient detail.
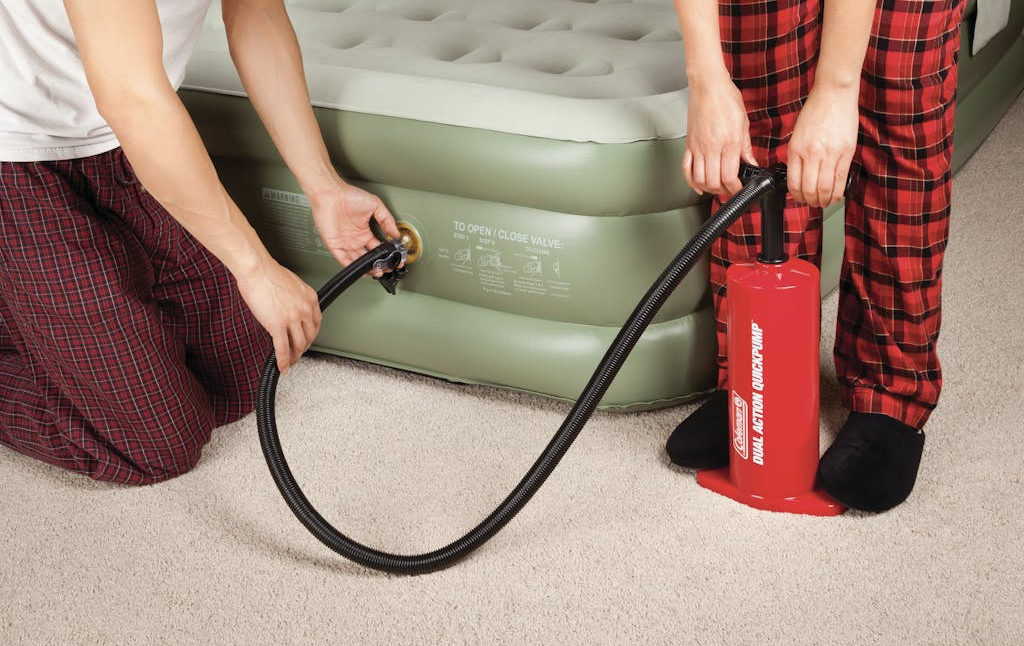
A Coleman Dual Action QuickPump in bright red is being used to inflate a pale green air mattress with a cream colored topper. One person is visible from the torso down dressed in burgundy and black flannel pants and a white t-shirt positioned in the left of the image is holding the hose of the pump steady as it inflates the air mattress. Another person visible from the legs down is dressed in bright red and flannel plants and black socks is stepping on either side of the air pump and holding onto the handles with both hands. They are set on a beige colored carpeted floor.
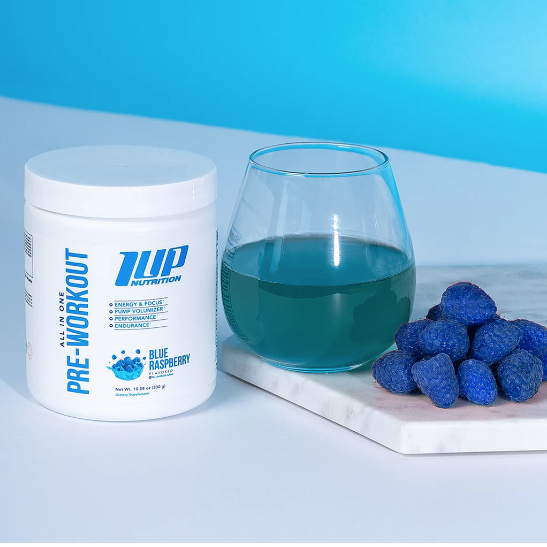
A white cylindrical container labeled “1UP Nutrition Pre-Workout” prominently placed on the left, on top of a marble slab with natural gray veining. Next to it, a stemless, rounded clear glass containing a blue liquid, slightly off-center to the right. Adjacent to the glass, a small pile of bright blue, round candies rests directly on the marble surface. The setting features a powder blue background that graduates to white at the base, matching the container’s color scheme.
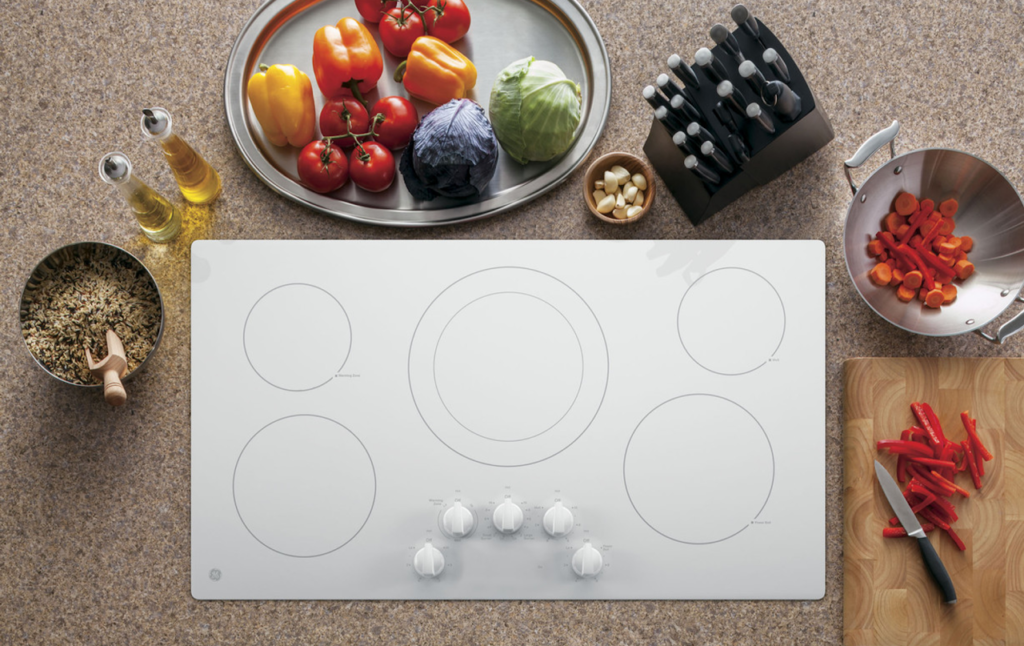
A white induction cooktop with five burners, viewed from above, centered within a granite countertop. Surrounding the cooktop are assorted cooking items: a stainless steel bowl of vegetables and fruit to the left, a knife set and two cooking oils to the upper right, and a metal sauté pan with red sliced peppers to the lower right. The setup is on a well-lit wooden surface, creating a contrast with the neutral tones of the granite.
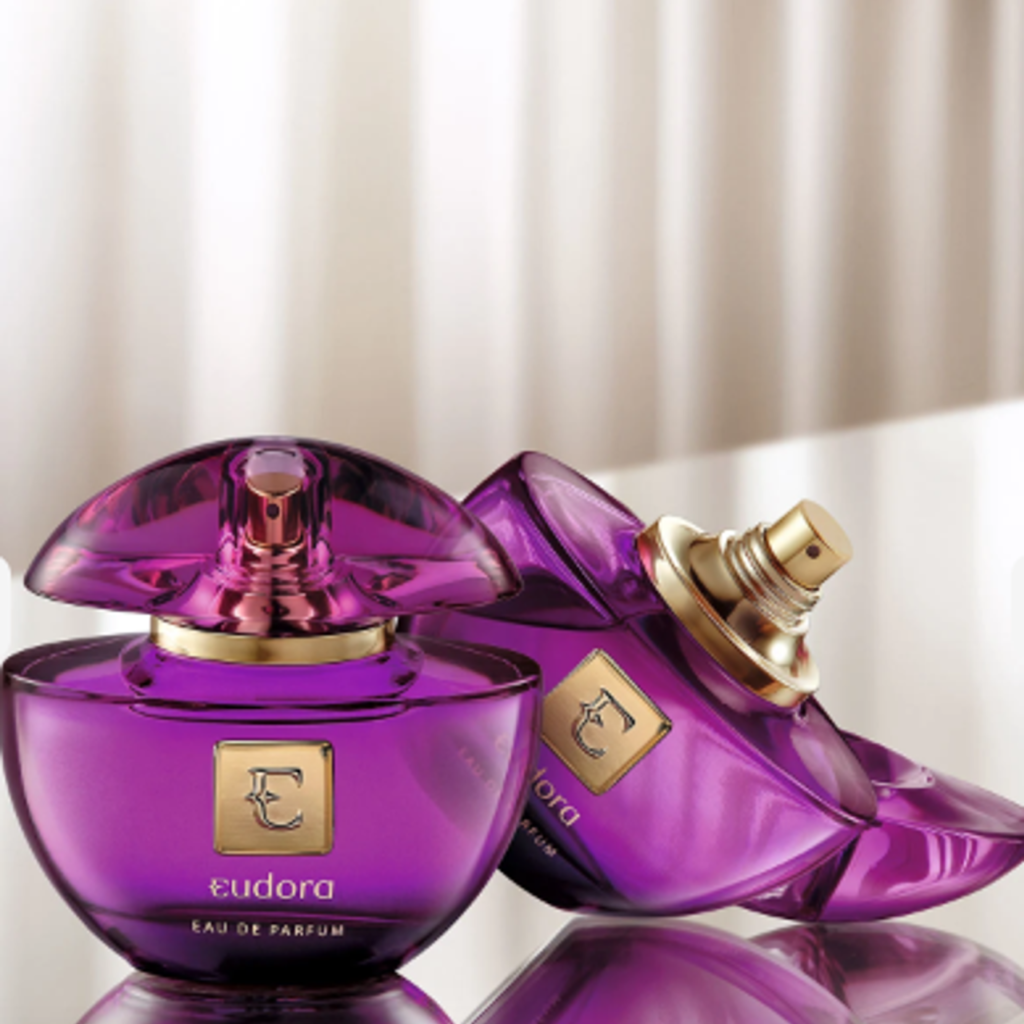
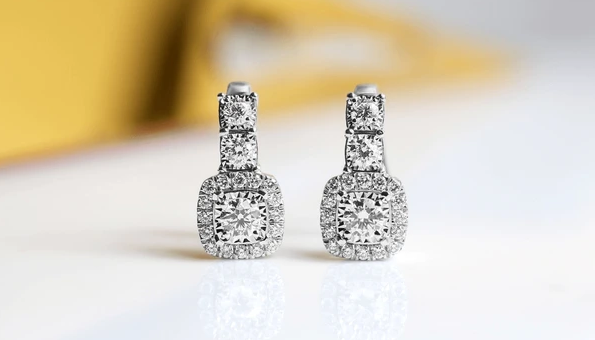
Two purple, oval shaped perfume bottles with gold labels and caps are positioned on a reflective, slightly off-white surface. The bottle on the left stands vertically, while the one on the right lies horizontally with the cap off, revealing the spray nozzle. The perfume bottles have a rectangular gold logo in the center and the words “Eudora” and “Eu De Parfum” written in gold underneath it. The background consists of evenly spaced, vertical light beige and white curtains.
9. Camera Shot
Indicate what type of camera shot was used in the Lifestyle Image only. Provide an Other free form field.
Shot-Type List
Close-Up (CU): Focuses on the subject closely with little around the frame.
Medium Shot (MS): Frames the subject from the waist up.
Long Shot (LS): Captures the full body of the subject within the environment.
Extreme Close-Up (ECU): Zooms in on a small detail of the subject.
Wide Shot (WS): Emphasizes the surroundings with the subject in the frame.
Low Angle Shot: Filmed from below towards the subject.
High Angle Shot: Filmed from above to towards the subject.
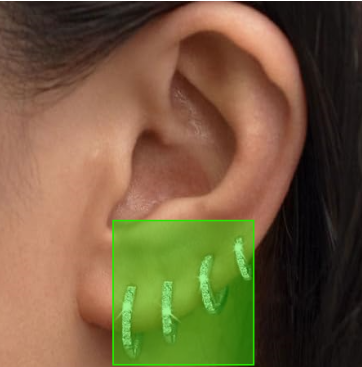
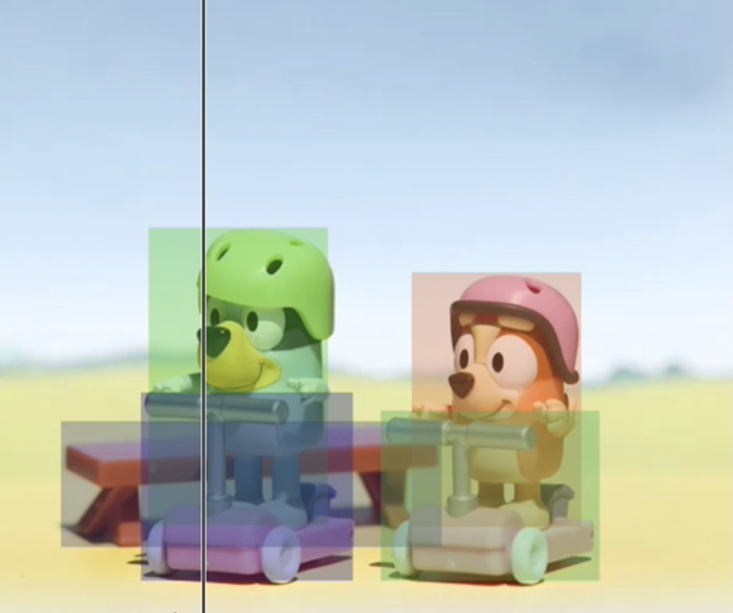
10. Bounding Box
Label the Lifestyle Image as either “In the wild” OR “Plain background”.
1. Make sure that the product is not being cropped within the bounding boxes. It should cover the entire product with little spaces. Doesn’t need to be really small spaces, as long as the product is not too far from the bounding box.

This is not acceptable as the entire product must be inside the bounding box.
This can be accepted.
Please note that the bounding box may not reach the very edges when setting it up. It’s okay if the corners are not perfectly aligned.
2. If the image only features the product and no other items visible, bounding boxes is not required. Only required if there are other items in the image aside from the product.

3. If the product is a set, there should only be 1 bounding box for the entire set.
Please note that a bounding box is not required for a product set in a Product Image.

4. If the product is sold per piece, and the image features duplicates of the same product, please create only one (1) bounding box on either of the duplicated product.

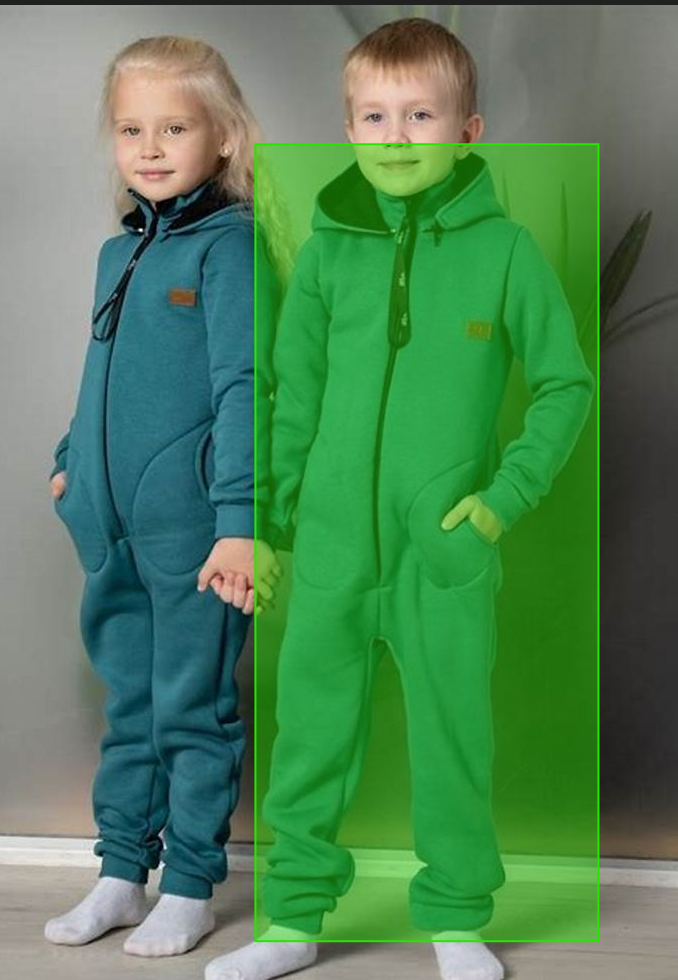
5. Multiple products in one image. Different objects in the images are fine. Place the Bounding Box around the product that was annotated. Bounding boxes will help us identify and map these images

11. Video
If the product URL includes a video, upload it and provide a caption.
Uploading a video is only required if the video is 10 seconds or less.
1. Use video downloader (e.g. this Chrome Extension), we’ve also found that https://cobalt.tools/?ref=producthunt is good with downloading Youtube videos.
2. Enter the URL of the product page that contains the video
3. Download the mp4 file and add it to the data set
4. Provide a caption for the video
5. Check “Does the product page contain videos?” checkbox
For videos that are more than 10 seconds, please just mark the checkbox that there is a video available for the product.
Example video and caption
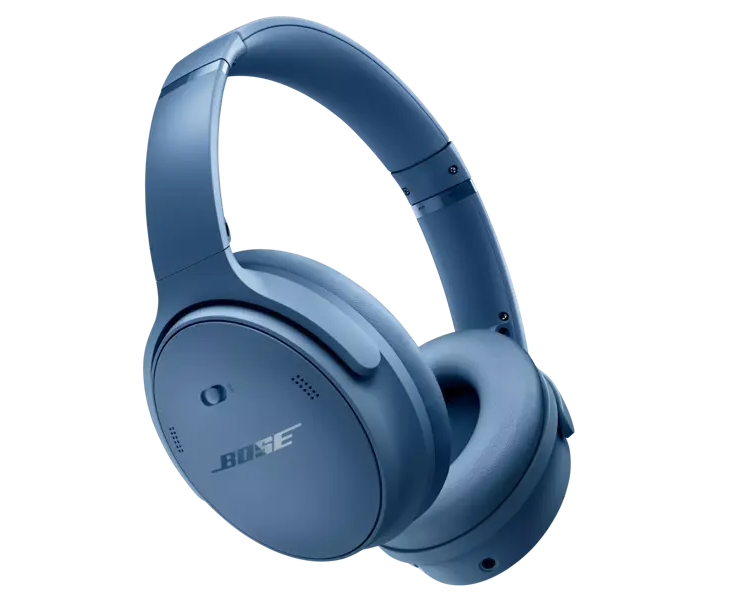
A young woman with shoulder length, bright red hair with bangs is wearing a pair of gray Bose over ear headphones. She is walking down the street in a green hoodie and is shown from multiple angles wearing the headphones, smiling, and looking around at her surroundings.
*️⃣ Reminders & Best Practices
1. Install the Grammarly Chrome Extension and always use it while annotating to easily avoid spelling and grammar mistakes
2. IMPORTANT: Only describe what is visible in the image. The goal of the caption is to train the AI model on what it is seeing in the image, not to sell it the product. Do NOT include descriptions such as:
1. 🚫 ”Adds a stylish touch to any living room” 🚫
2. 🚫 ”Making it perfect for day to night wear” 🚫
3. 🚫 ”Necessary addition to your wardrobe” 🚫
Bounding Boxes
Use 2 point bounding box (Upper Left, Bottom Right)
For Product Image (where there are multiple items) and Lifestyle Image (all lifestyle images), draw Bounding Boxes (multiple) around the product to map where the product is in the image. Aim to keep the boundary of the bounding box as thin as possible (little margin around the product).
Single Product in an Image Example
If no other object is present in the Product image, no bounding box is required.
Multiple Products in an Image Example
Please watch this video: ⬇️
Rules / Qualification
What is considered acceptable when identifying images to source:
Duplicate objects within an image are fine (both on product or lifestyle images)
Different objects in the images are fine. Bounding boxes will help us identify and map these images
Example Valid and Invalid Product Images
Product
Images
Valid Images
Invalid Images
Lifestyle
Images